
I’d like to pick up where I left off on the greywater mulch basin project I started in the Spring and give a quick update on how it’s been performing, especially now that freezing temperatures have hit. As a reminder, I live in New England in climate zone 5.
3 Season Performance (Spring-Fall)
All in all, the performance of the system has been excellent. The transplanted ferns thrived in their new location. There was zero odor.
Initially, I had some minor pooling around the base of the basin during periods of heavy use, like washing dishes and taking a shower or doing laundry in quick succession. As the mulch has begun to settle and decay, however, its capacity to absorb water seems to have increased. I rarely see any seepage from under the walls of the basin now, even after heavy use.
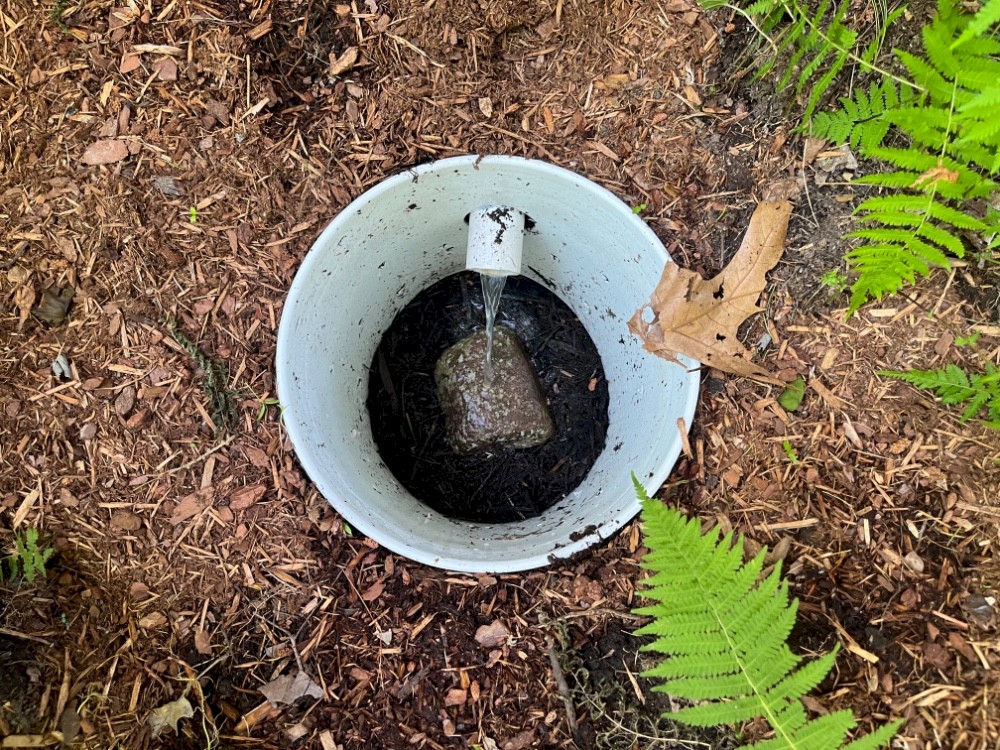
I suspect the addition of a “splash block” to the bottom of the mulch shield has also helped with this. Now when the water drains into the mulch, it hits this strategically placed rock which causes the water to disperse more evenly instead of pouring into just one spot.

If I could go back and do one thing differently, it would be to loosen up the top 6-12” of soil under the mulch before setting up the basin. This would allow the water to be more readily absorbed into the soil layer after percolating through the mulch.
At one point I made the mistake of adding some 1/4” hardware cloth screening to the end of the PVC pipe, thinking this would mitigate any risk of mice or insects climbing in. It quickly clogged up with lint from the washing machine, so I removed it.
Winterizing the Basin
Insulating the Drain Pipe
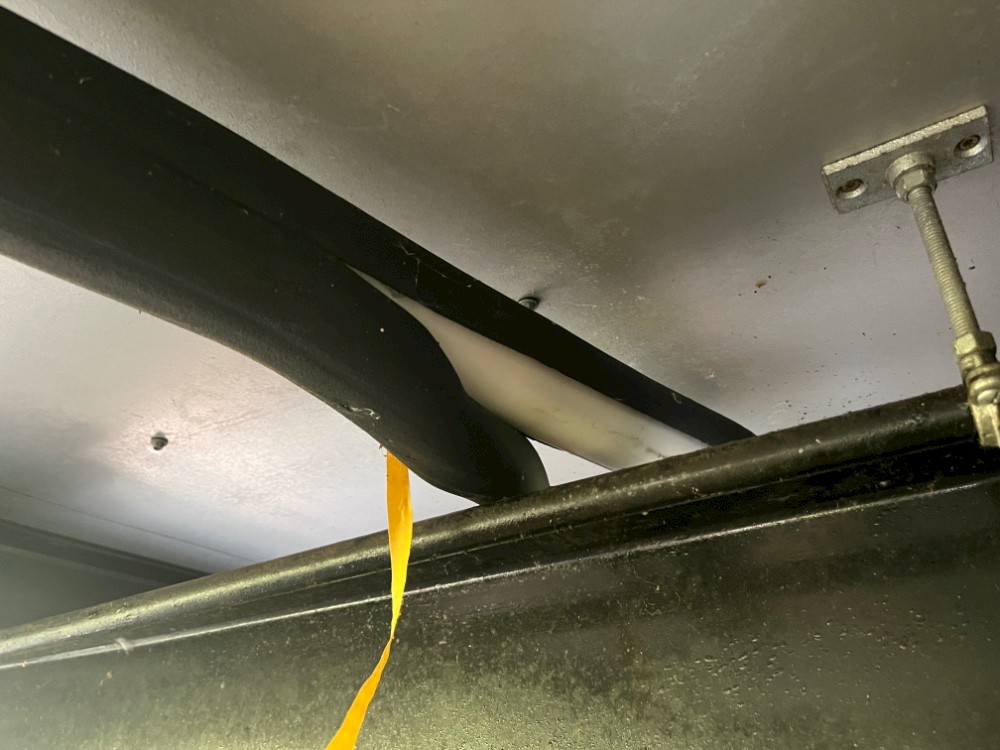
During the Fall I added some insulating EPDM foam around the PVC drain pipe in preparation for freezing temperatures. Because these only come in smaller sizes like 1/2” ID and 3/4” ID, I used a 3/4” ID and 1/2” ID together to give me enough material to wrap the 1-1/2” PVC drain pipe (you could use 2 3/4” ID pieces together as well, but the fit may be a bit loose). These insulation tubes come pre-split with adhesive strips. I used some black gorilla tape to keep it all together.


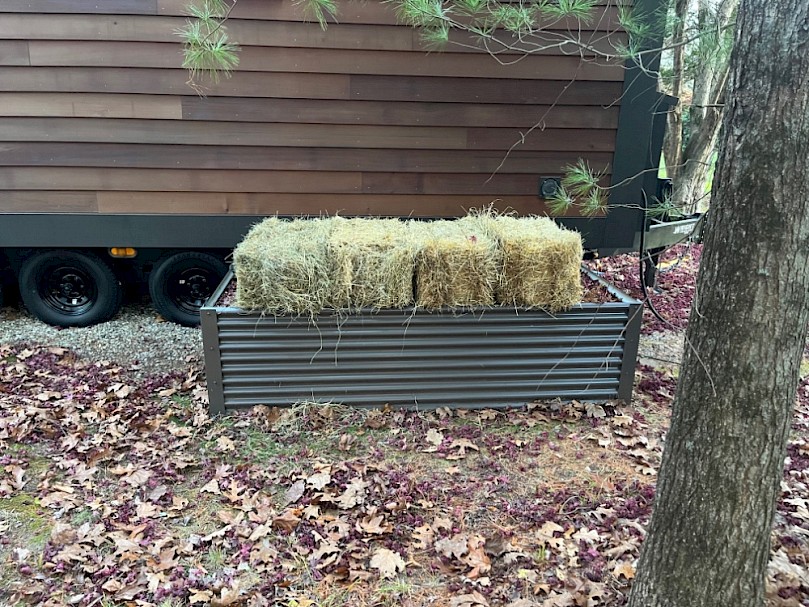
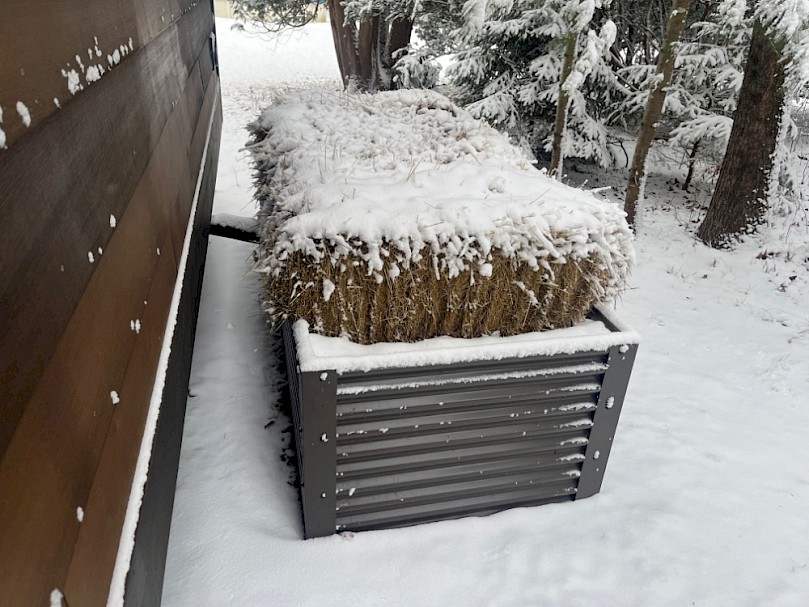
Natural Insulation Using Hay Bales
Once the ferns went dormant for the winter, I purchased some hay bales from a local farm and stacked them on top of the basin for insulation, my hope being that the bales would provide enough R-value to keep the core of the basin from freezing and to continue functioning over the winter (over the summer I will repurpose these bales as compost cover material). Before adding the bales, I topped off the basin with some fresh mulch since it had compacted down a few inches over the summer. I also added a few inches of fresh mulch to the bottom of the mulch shield.

For Science
While I was at it, I built a bag out of some leftover smart vapor barrier material and dropped in a little Govee bluetooth temperature sensor (affiliate link). Then I taped the bag to the inside of the mulch shield (modified bucket). This would allow me to continually monitor the temperature inside the mulch shield and see how it compared with the temperature outdoors. There is not a lot of information out there on the use of mulch basins during in below freezing temperatures (many people divert greywater to septic or sewer for the season), so this is an experiment that I hope will help others looking for a more sustainable year-round solution.

Winter Performance
The bottom line: So far, so good.
On the 15th of December (last Monday—one of our coldest days yet), the temperature outside was 15 degrees Fahrenheit. At the same time, the temperature inside the mulch shield was 50 degrees. More generally, I’m seeing temperatures about 20 degrees warmer than the outdoor temp. The lowest reading inside the mulch shield I’ve seen yet this season was 43 degrees.
This has surpassed my expectations. It appears that the mulch is actually composting and generating heat in the process, which is keeping temperatures well above freezing for the time being.
Will the biological activity slow down over time and cause the temperature to drop? Will it be able to withstand a longer and deeper cold snap? We’ll just have to wait and see!

Product Recs
Some of these are Amazon Associate links, which means I earn a small commission if you buy through them at no cost to you. Thanks for your support!


Categories: Eco Sanitation (Ecosan)
Comments: 2 Comments
Comments
Comment by Timothy Haymond on 1 April 2026 10:00 pm
Hello, I am working on designing a greywater system in northwestern Montana and am really interested to hear how your system has faired all winter? Also if there is anything you would do differently in the future for harder winters. Montana has similar length winters to the northeast but different climate with harsher swings in temperature. Thanks, Timothy.
Comment by Mike Spooner on 13 May 2026 10:25 am
Hi Timothy,
Thanks for the comment and sorry I didn't see it sooner. The system worked great all winter. The wireless thermometer failed a couple months into the experiment so I wasn't able to get any data after that, but the drains kept draining so I'm pretty confident the system never froze.
My only question for next winter would be whether I would need a significant injection of fresh mulch material to continue to achieve the heat I was seeing from decomposition. The material in the basin shrunk and compacted quite a bit over the season.
For harsher climates, the only thing I can suggest is more hay bales for more insulation. If the basin is above ground like mine, you could add bales around the perimeter as well as on top.
The ferns have also started coming up again since removing the hay bales. Bonus is now I have lots of decomposing hay for compost cover and mulching my garden this summer.
Post a comment